
advertisement
Close your eyes and imagine the sublime fusion of creamy cheesecake with the unique, nutty flavor of pistachios. This Pistachio Cheesecake is not just a dessert; it’s an experience—a delightful journey through layers of flavor and texture that will leave your taste buds dancing. Whether you’re celebrating a special occasion or simply indulging in a moment of culinary bliss, this cheesecake is guaranteed to impress. Let’s create this pistachio paradise together!
advertisement
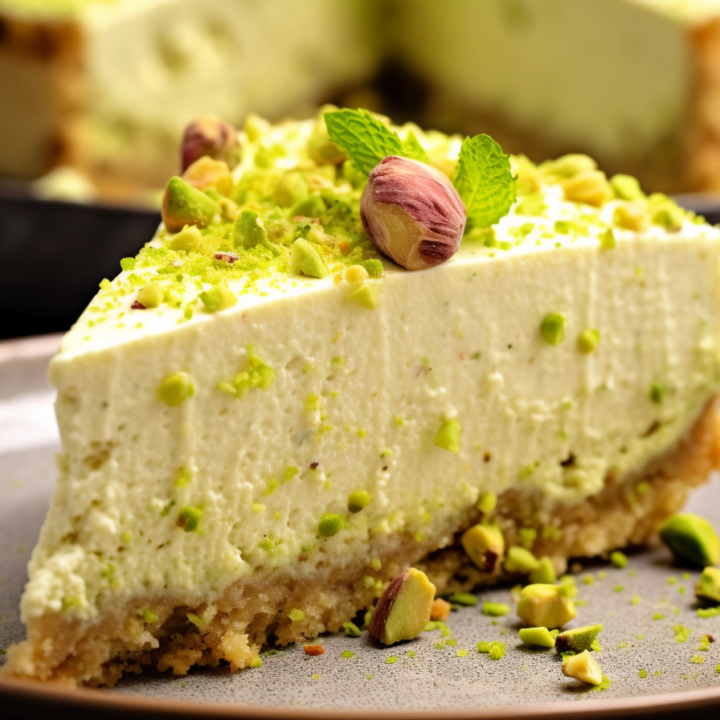
This Pistachio Cheesecake combines a crisp, nutty base with a luxuriously smooth pistachio-infused cream cheese filling, all topped with a rich cream cheese frosting and a sprinkle of chopped pistachios. The perfect blend of sweet and savory, it’s a dessert that looks as stunning as it tastes.
Ingredients List:
For the Cheesecake Base:
1/2 cup unsalted butter, softened
1/2 cup powdered sugar
1 egg yolk
1/4 teaspoon salt
1 cup all-purpose flour
1/4 cup pistachio flour
1/4 cup almond flour
1/4 cup chopped pistachios
3 tablespoons coconut oil
2 tablespoons melted unsalted butter
For the Cream Cheese Filling:
21 oz cream cheese
1/2 cup granulated sugar
2 large eggs
1/3-2/3 cup pistachio paste
1/2 cup heavy cream
1/4 cup chopped pistachios
For the Cream Cheese Frosting:
5 oz cream cheese
1/4 cup heavy cream
1/4 cup powdered sugar
2 tablespoons pistachio paste
Equipment:
8-inch cheesecake pan with 3-inch sides
Wilton 4B tip
Icing bag
Cooking Instructions :
Prepare the Cheesecake Base: Begin by preheating your oven to 350°F (180°C). In the bowl of your stand mixer, beat the softened butter and powdered sugar together until light and fluffy. Add in the egg yolk and mix again, scraping down the sides as needed. Blend in the all-purpose flour, salt, pistachio flour, almond flour, and chopped pistachios until crumbs form.
Shape and Bake the Base: Transfer the dough to a parchment-lined baking tray, cover with plastic wrap, and freeze for at least 30 minutes. Once chilled, bake for 17-20 minutes until golden brown and crispy. Let it cool completely, then grind into crumbs using a food processor. Combine the crumbs with coconut oil and melted butter, pressing this mixture into the bottom and sides of your cheesecake pan. Freeze for another 30 minutes to set.
Make the Cream Cheese Filling: Preheat your oven to 300°F (150°C). In your mixer, beat the cream cheese and granulated sugar until smooth and creamy. Add the eggs one at a time, mixing well after each addition. Blend in the pistachio paste and heavy cream until fully incorporated, then stir in the chopped pistachios.
Assemble and Bake: Pour the filling over the chilled crust, smoothing it out evenly. Bake in a water bath for 60-90 minutes until the top is light brown and the center has a slight jiggle. Cool the cheesecake on a wire rack for 2 hours, then cover and refrigerate for at least 6 hours or overnight.
Prepare the Cream Cheese Frosting: Beat the chilled cream cheese and heavy cream together until smooth. Add the powdered sugar and pistachio paste, continuing to mix until fully combined. Use an icing bag fitted with a Wilton 4B tip to pipe rosettes around the edge of the cheesecake. Sprinkle with additional chopped pistachios for a beautiful finish.
Tips and Notes:
Water Bath: Ensuring a smooth, crack-free cheesecake involves baking in a water bath. Wrap your pan in foil to prevent water from seeping in.
Chilling Time: Patience is key! Make sure to chill the cheesecake thoroughly to allow flavors to meld and the texture to set.
Serving Tip: For clean slices, dip your knife in hot water and wipe it dry before each cut.
Substitutions and Variations:
Nut-Free Option: Substitute the pistachio flour and chopped pistachios with more almond flour or oats if you have a nut allergy.
Low-Sugar Version: Use a sugar substitute like erythritol in place of granulated sugar.
Flavor Twist: Add a hint of lemon zest to the cream cheese filling for a refreshing citrus twist.
Approximate Nutrition Information (per serving):
Calories: 561 kcal
Sugar: 42g
Sodium: 199mg
Fat: 25g
Saturated Fat: 8g
Carbohydrates: 50g
Fiber: 3g
Protein: 8g
Cholesterol: 105mg
Pistachio Cheesecake
Ingredients
- Cheesecake Base:
- 1/2 cup unsalted butter, softened
- 1/2 cup powdered sugar
- 1 egg yolk
- 1/4 teaspoon salt
- 1 cup all-purpose flour
- 1/4 cup pistachio flour
- 1/4 cup almond flour
- 1/4 cup chopped pistachios
- 3 tablespoons coconut oil
- 2 tablespoons melted unsalted butter
- Cream Cheese Filling:
- 21 oz cream cheese
- 1/2 cup granulated sugar
- 2 large eggs
- 1/3-2/3 cup pistachio paste
- 1/2 cup heavy cream
- 1/4 cup chopped pistachios
- Cream Cheese Frosting:
- 5 oz cream cheese
- 1/4 cup heavy cream
- 1/4 cup powdered sugar
- 2 tablespoons pistachio paste
- Equipment:
- 8-inch cheesecake pan with 3-inch sides
- Wilton 4B tip
- Icing bag
Instructions
Prepare the Cheesecake Base:
Preheat your oven to 350°F (180°C).
In a stand mixer, beat the softened butter and powdered sugar until light and fluffy.
Add the egg yolk and mix again, scraping down the sides as needed.
Blend in the all-purpose flour, salt, pistachio flour, almond flour, and chopped pistachios until crumbs form.
Transfer the dough to a parchment-lined baking tray, cover with plastic wrap, and freeze for at least 30 minutes.
Bake for 17-20 minutes until golden brown and crispy. Let cool completely, then grind into crumbs using a food processor.
Combine the crumbs with coconut oil and melted butter, pressing this mixture into the bottom and sides of your cheesecake pan. Freeze for another 30 minutes to set.
Make the Cream Cheese Filling:
Preheat your oven to 300°F (150°C).
In your mixer, beat the cream cheese and granulated sugar until smooth and creamy.
Add the eggs one at a time, mixing well after each addition.
Blend in the pistachio paste and heavy cream until fully incorporated, then stir in the chopped pistachios.
Pour the filling over the chilled crust, smoothing it out evenly.
Bake in a water bath for 60-90 minutes until the top is light brown and the center has a slight jiggle.
Cool the cheesecake on a wire rack for 2 hours, then cover and refrigerate for at least 6 hours or overnight.
Prepare the Cream Cheese Frosting:
Beat the chilled cream cheese and heavy cream together until smooth.
Add the powdered sugar and pistachio paste, continuing to mix until fully combined.
Use an icing bag fitted with a Wilton 4B tip to pipe rosettes around the edge of the cheesecake.
Sprinkle with additional chopped pistachios for a beautiful finish.
Notes
- Water Bath: Ensuring a smooth, crack-free cheesecake involves baking in a water bath. Wrap your pan in foil to prevent water from seeping in.
- Chilling Time: Patience is key! Make sure to chill the cheesecake thoroughly to allow flavors to meld and the texture to set.
- Serving Tip: For clean slices, dip your knife in hot water and wipe it dry before each cut.
This Pistachio Cheesecake is a true masterpiece, combining rich, nutty flavors with the creamy decadence of classic cheesecake. Perfect for any celebration or simply to treat yourself, it’s a dessert that speaks of love and indulgence. Give it a try and share your culinary creation with us—we’d love to see how it turned out for you!
Frequently Asked Questions:
Q: Can I make this cheesecake ahead of time?
A: Yes, this cheesecake can be made up to two days in advance. Just keep it covered in the refrigerator.
Q: How do I store leftovers?
A: Store any leftovers in an airtight container in the refrigerator for up to 5 days.
Q: Can I freeze this cheesecake?
A: Absolutely! Wrap the cheesecake (without the frosting) tightly in plastic wrap and foil, then freeze for up to 3 months. Thaw overnight in the fridge before decorating and serving.